
If you’re about to embark on a major DIY project in your home or office, familiarizing yourself with stud protectors is a must. The use and proper placement of stud protection plates could mean the difference between safety and water damage or a fire hazard. Before you start your next project, allow us to walk you through the basics of a stud protector and why it’s necessary.
What is a Stud Protector?
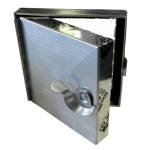
A stud protector, also known as a nail plate or stud protection plate, is a piece of metal containing pre-drilled nail holes. Nail plates are installed over studs and joists to help protect pipes or wires within your wall from punctured drywall screws. Stud protectors come in various thicknesses and lengths to meet all your needs. For maximum durability, nail plates are made with galvanized steel.
Additionally, nail plates are essential to comply with code requirements, including:
- reinforcement of wood members
- protection of other utilities within the wall
- a hole is closer than 11⁄4″ to the edge of a wood member
- more than 50% of the top plate’s width has been removed, and piping is closer than 1-1⁄2″ from the edge of the top plate. A galvanized structural protection plate is required and must be:
- fastened with 10d-16d nails on each side of the cut
- must extend 2″ below and above the framing member
When Are Nail Plates Installed?
Nail plates are typically installed during a new build or remodeling project. They are set in place before wall covering is added or removed for a remodel. Stud protector plates protect against an accidental screw or nail through a stud that may be critical housing elements while hanging shelves, installing cabinets, or installing fire dampers in your HVAC system.
Why are Stud Protector Plates Necessary?
Imagine moving into your new home, apartment, or office space. Just as you hammer your first nail into a stud, you receive the shock of your life. Literally. Without proper protection from nail protectors, it’s not that uncommon to drive a nail right through to a live wire or water pipe. Nail plates, especially when installed on both sides of each wall stud, can eliminate accidental electrical shock, leaky pipes leading to extreme water damage, and fire risk.
Nail Plate Sizing
While nail plates come in various sizes and shapes, the most common for at-home DIY projects are typically three inches in length and one-half inch in width. Larger projects, including fire damper installation or industrial projects, require nail plates ranging from three to sixteen-hole patterns and typically eighteen inches in length for optimal coverage and protection.
DIY: Installing Nail Plates for Wire Protection
If you’re tackling a home renovation or installing fire dampers into your system, adding stud protectors is not a step you want to skimp on. New wire installation is a relatively common DIY project and should be approached with care and safety. We’ll walk you through the steps to ensure you, your pipes, and wires stay protected.
In preparation, you’ll want to have the following tools handy for your project:
- Hammer
- Measuring tape
- Pencil
- Nails
- Screws
- Drill
- Screwdriver
- Stud protectors
Follow these steps for proper installation:
- Drill your wiring holes through the wall studs.
- Run your wiring to the outlet, junction boxes, and switch.
- Hold the stud protector plate on the outside of the wall stud, ensuring it is over your wiring hole.
- Nail in each spike that attaches the top and bottom of the stud plate into the stud.
- Add a second nail plate onto the other side of the stud while you’re at it. Repeat steps four and five on the opposite side.
- Repeat the steps, covering all wire holes with nail plates to ensure your space is safely protected.
While you’re at it, consider adding additional nail plates to all the living spaces that are accessible during your remodel. Cover areas that may be prime for hanging heavy frames, speakers, or mounting the flatscreen later on. Covering your bases now will save you lots of hassle in the future.
Nail Plates for Water Pipe Protection
If you’re taking on a plumbing project, nail guards are a code requirement where water pipes may run through or even near your wall studs. According to the International Plumbing Code, or IPC:
“305.6 Protection against physical damage: In concealed locations, where piping, other than cast-iron or galvanized steel, is installed through holes or notches in studs, joists, rafters, or similar members less than 1-½ inches from the nearest edge of the member, the pipe shall be protected by steel nail protection plates. Protector plates shall have a thickness of not less than .575″.”
“312.9 Steel Nail Plates. Plastic and copper piping penetrating framing members to within 1 inch (25.4 mm) of the exposed framing shall be protected by steel nail plates not less than No. 18 gauge (0.0478 inches) (1.2 mm) in thickness. The steel nail plate shall extend along with the framing member not less than 1½ inches (38 mm) beyond the outside diameter of the pipe or tubing. Exception: See Section 1210.3.3.”
Is My Older Home or Building Protected?
It’s important to note your older home or office building may not be as protected as you think. If building code requirements are not easily accessible to your older or historic home or building, proceed with caution. It will save you tremendous time, money, and stress if you assume your home or office is not equipped with the proper nail guards. It’s best to avoid possible fire and water damage by calling a professional or installing plates before any workaround studs.
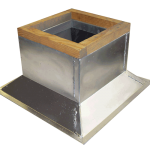
Stud Protectors for Fire Damper Installation
We highly recommend utilizing a properly trained and qualified fire damper installation service to ensure proper safety protocols. The incorrect installation of fire dampers and HVAC systems, in general, can pose a health and safety risk to your family or tenants.
If you do have some knowledge and experience in the industry and are set on performing your fire damper installation, we recommend reviewing our helpful fire damper installation video. We’ll walk you through each step and guide you through measurements, requirements, and best practices. Before your installation, familiarize yourself with your system and surroundings. Note areas in need of nail protector plates and how many you will need on hand. Contact a knowledgeable representative to ensure you purchase the correct nail guard sizes for your system.
Ensure the safety and integrity of your home or office for your next renovation!